Home › Basement Waterproofing › Waterproofing Membranes
Waterproofing Membrane Guide: Types, Applications and Installation
Waterproofing membranes protect basements and below-ground structures from groundwater ingress. Here's how the three main systems work and which to choose for your project.
10 min read · Last reviewed: 3 July 2026
Quick summary
- Type A (barrier): External tanking membranes applied to outside of walls before backfilling; best for new builds; £80-150/sq m
- Type B (integral): Waterproof concrete with additives; forms structure and waterproofing in one; £30-50/cu m extra over standard concrete
- Type C (drained cavity): Internal studded membranes that channel water to drainage; best for retrofit; £60-120/sq m
- BS 8102 grades: Grade 1 (basic utility), Grade 2 (workshops/plant), Grade 3 (habitable), Grade 4 (archives/special uses)
- Redundancy: Most basements use dual protection (Type A+C or Type B+C) for insurance compliance
- UK standard
- 2022 (BS 8102:2022, current edition)
- Type A external tanking
- £80-150 per m²
- Type C cavity drain
- £60-120 per m²
- Type B waterproof concrete
- £30-50 extra per m³ of concrete
- Typical membrane lifespan
- 50+ years for Type A and Type C systems
What is a waterproofing membrane?
A waterproofing membrane is a barrier system that prevents water penetrating below-ground structures. In basements, cellars, and underground rooms, groundwater exerts hydrostatic pressure on walls and floors. Without protection, this moisture will seep through masonry and concrete, causing damp conditions and structural damage.
Waterproofing membranes work by either blocking water completely (barrier systems) or managing water entry by channeling it to controlled drainage points (drained systems). The choice depends on water table levels, access for installation, and the intended use of the space.
BS 8102 and the three types of protection
BS 8102:2022 (Code of practice for protection of below ground structures against water ingress) is the UK standard for basement waterproofing.1 It defines three protection types:
Type A: Barrier protection (external tanking)
A continuous waterproof membrane applied to the external face of walls and under the floor slab. The membrane forms a barrier that blocks water before it reaches the structure. Common materials include:
- Bitumen-based sheet membranes
- Polymer-modified liquid coatings
- Bentonite clay panels (swell when wet to seal gaps)
- HDPE or PVC sheet membranes
When to use: New builds where excavation is already taking place. Sites with high water tables or significant hydrostatic pressure. Where internal space must be maximised (no cavity loss).
Pros: Most reliable when installed correctly. Keeps structure dry. No ongoing maintenance.
Cons: Requires external access and excavation. Expensive in retrofit (£15,000-40,000 for a typical terrace cellar)4. Any damage during backfilling is difficult to repair later. Relies on perfect installation with no weak points.
Type B: Structurally integral protection (waterproof concrete)
The concrete itself is waterproof, either through dense mix design (low permeability concrete) or by adding crystalline waterproofing admixtures. The structure and waterproofing are combined in one element.
When to use: New concrete basements. Where external tanking is impractical. Where structure will be subject to hydrostatic pressure but external membrane cannot be guaranteed.
Pros: No separate membrane to fail. Relatively low cost (adds £30-50 per cubic metre to concrete). Self-healing crystalline additives can seal minor cracks.
Cons: Relies on perfect concrete pour with no honeycombing or cold joints. Any construction defect compromises waterproofing. Not suitable for retrofit. Requires specialist concrete supplier and strict quality control.
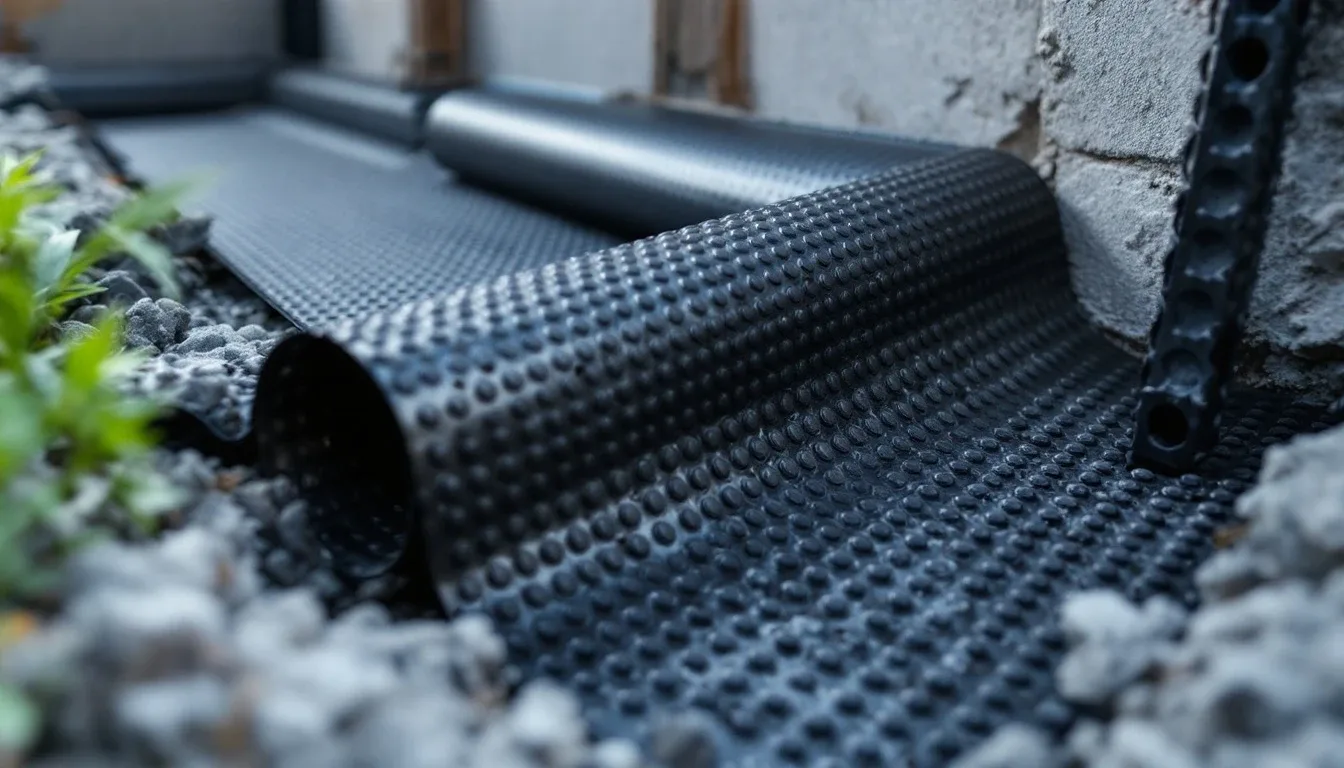
Type C: Drained cavity protection (internal membranes)
A studded plastic membrane fixed to the internal face of walls and floors. Water passes through the structure, hits the membrane, and drains down to a collection channel at floor level. The channel connects to a sump and pump that removes water to external drainage.
When to use: Retrofit basement conversions where external excavation is not viable. Cellars with ground water pressure. Where Type A or B cannot be guaranteed. Most common system in UK domestic conversions.
Pros: Can be installed internally with no excavation. Works even if water is actively entering. Least disruptive for retrofit. Easier to inspect and repair.
Cons: Requires sump pump maintenance. Reduces internal space by 50-100mm. Ongoing electricity cost for pump. If pump fails, water backs up. Cold internal surface requires insulation.
Grades of protection: what environment do you need?
BS 8102 defines four grades based on the intended use of the below-ground space:
- Grade 1: Basic utility (car parking, plant rooms). Some seepage and dampness acceptable. Type C only may suffice.
- Grade 2: Workshops and plant rooms requiring drier environment. No water penetration but humidity tolerable. Type C with good ventilation.
- Grade 3: Habitable space (offices, residential). Dry environment required. Usually Type C + dehumidification, or Type A+C dual system.
- Grade 4: Special uses (archives, stores). Controlled humidity essential. Type A+B or Type B+C dual system with environmental controls.
Most residential basement conversions target Grade 3.1 Building Control and mortgage lenders typically require independent certification (often via CSSW structural warranty providers) for habitable basements.
Dual protection systems
BS 8102 recommends using two complementary types of protection for habitable basements. If one system fails, the second provides backup. Common combinations:
- Type A + Type C: External tanking as primary, internal cavity drainage as backup. Used in new builds on sites with high water tables.
- Type B + Type C: Waterproof concrete as primary, internal cavity drainage as backup. Common in new basement construction.
Dual systems add cost (£120-200/sq m total) but are often required by insurers and warranty providers for Grade 3+ basements.
Cavity drain membrane installation (Type C)
Materials
- Studded HDPE membrane (Delta-MS, Newton, Platon, or similar)
- Floor drainage channel with outlets to sump
- Sump chamber and automatic pump
- Proprietary plugs and sealing tape
- Battens and plasterboard for internal finish (or bonding plaster if membrane supports it)
Step-by-step process
- Prepare surfaces: Remove loose render. Fill large voids with mortar. Surface does not need to be perfectly smooth.
- Install floor drainage channel: Lay perimeter channel at base of walls, sloping to sump location. Connect outlets.
- Fix wall membrane: Start at floor level. Fix membrane to wall with proprietary plugs spaced 300-400mm apart. Studs face inward to create cavity. Overlap vertical joints by 100mm and seal with tape.
- Install floor membrane: Lay membrane over floor slab, overlapping wall membrane at base. Connect to drainage channel.
- Install sump and pump: Dig sump chamber (typically 600mm diameter × 900mm deep) at lowest point. Install pump with float switch. Connect to external drainage via 40mm pipe.
- Internal finish: Batten over membrane (25-50mm battens) and fix plasterboard. Or apply bonding plaster directly to membranes designed for plastering.
- Insulation: Install insulation between battens if required for thermal performance.
Cost breakdown
- Membrane sheets: £8-15/sq m
- Drainage channel: £15-25/linear metre
- Sump and pump: £400-800
- Labour: £35-50/sq m
- Total: £60-120/sq m for walls and floor
A 4m × 5m basement (20 sq m floor, 32 sq m walls) would cost approximately £3,100-6,200 for Type C protection including pump and drainage.
External tanking installation (Type A)
Step-by-step process
- Excavate: Dig down to foundation level. Expose full height of external walls plus footings.
- Clean and prepare: Remove soil and debris. Repair any cracks or damage to masonry. Apply render coat if surface is very uneven.
- Prime surface: Apply bitumen primer or bonding agent as specified by membrane manufacturer.
- Apply membrane: Brush, roll, or torch-on bitumen sheeting. Or fix PVC/HDPE sheets mechanically. Overlap joints by 100mm. Extend membrane 150mm above final ground level.
- Protect membrane: Install protection board (dimpled plastic or insulation board) over membrane before backfilling. This prevents damage during soil compaction.
- Install drainage: Lay perforated land drain at footing level, sloping to soakaway or sump. Wrap in geotextile to prevent silt ingress.
- Backfill: Compact in layers. Ensure no sharp stones contact protection board.
Cost
Materials: £25-40/sq m
Labour + excavation + backfill: £55-110/sq m
Total: £80-150/sq m
For a typical cellar under a terraced house (30 sq m wall area), expect £15,000-25,000 including excavation, drainage, and making good paving.3
Maintenance and lifespan
- Type A (external tanking): Should last 50+ years if installed correctly. Cannot be inspected or maintained once backfilled. Any leak requires excavation.
- Type B (waterproof concrete): Expected to last life of structure (60+ years). Minor cracks self-heal with crystalline systems. Major cracks may require injection repair.
- Type C (cavity drain): Membrane lifespan 50+ years. Sump pump needs annual check and replacement every 7-15 years. Drainage channels should be inspected every 5 years. Total maintenance cost £50-150/year.
When waterproofing fails
Common causes
- Type A: Membrane damaged during backfilling. Joins not sealed. Membrane stops below water table. Tree roots puncturing membrane.
- Type B: Cold joints in concrete (pour interrupted). Honeycombing from poor compaction. Cracks from structural settlement exceeding design limits.
- Type C: Pump failure and water backup. Blocked drainage channels. Membrane punctured during internal finishing. Joins not sealed.
Remedying failures
Type A failures usually require excavation and patch repairs. Type B failures can sometimes be fixed with injection grouting. Type C failures are easiest to fix: clear blockages, repair/replace pump, or patch membrane from inside.
Frequently asked questions
What are the three types of waterproofing membranes?
BS 8102 defines three types: Type A (barrier protection using external tanking), Type B (structurally integral protection using waterproof concrete), and Type C (drained cavity protection using internal membranes). Each suits different water pressure levels and access conditions.
Which waterproofing membrane is best for basements?
Type C (cavity drain membrane) is most common for retrofit basement conversions because it can be installed internally without excavation. New builds often use Type A external tanking or Type B waterproof concrete. Most basements use a combination of two types for redundancy.
How much does basement waterproofing membrane cost?
Type C cavity drain membranes cost £60-120 per square metre installed. Type A external tanking costs £80-150 per square metre but requires excavation. Type B waterproof concrete adds £30-50 per cubic metre to concrete costs. Expect £8,000-20,000 for a typical basement conversion including drainage and pump.
Do I need Building Regulations approval for basement waterproofing?
Yes if you are converting a cellar to habitable use or building a new basement. Building Control will check structural calculations, waterproofing design, drainage, ventilation, and means of escape. Most lenders also require a structural warranty from CSSW scheme providers.
Can I install cavity drain membrane myself?
Technically yes, but most mortgage lenders and Building Control officers require certification by a specialist installer for habitable basements. DIY installation will not be covered by insurance-backed guarantees. For non-habitable spaces (workshops, storage), DIY is feasible if you follow manufacturer guidance.
Sources and further reading
- British Standards Institution (2022). BS 8102:2022 Code of practice for protection of below ground structures against water ingress. London: BSI. (accessed 3 July 2026)
- HM Government (2022). Approved Document C: Site preparation and resistance to contaminants and moisture. Available: gov.uk
- BRE (2012). BRE Good Building Guide 75: Refurbishment of basements, Part 1: Assessment and structural refurbishment. Watford: BRE Press. (accessed 3 July 2026)
- Structural Waterproofing Group (2024). Technical Guidance Notes on Basement Waterproofing Systems. Available: structural-waterproofing-group.com
Related guides: Basement Tanking Explained · Waterproof Membrane for Walls · Cellar Waterproofing Methods